
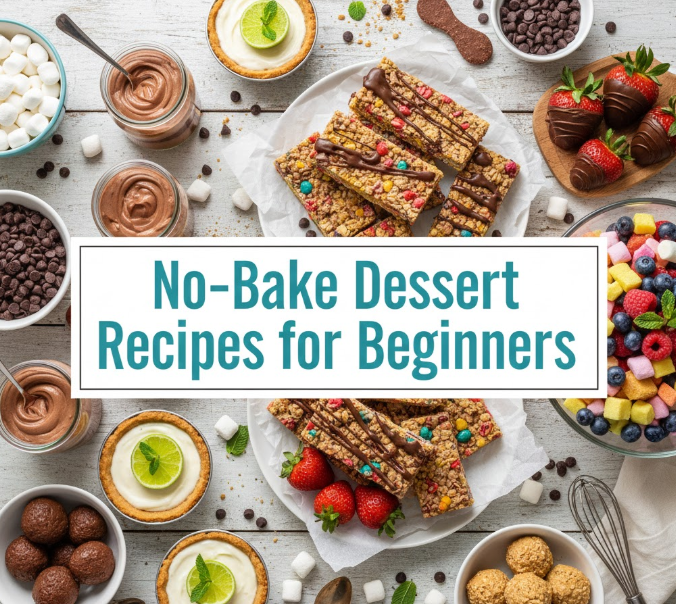
Why No-Bake Desserts Are the Best to Begin Your Sweet Life
Starting your baking adventure can feel like a daunting experience. You are concerned with the temperature of the oven, the time it will be in the oven, and whether your cake will rise. The good thing is that you do not need an oven to make great desserts.
No-bake desserts eliminate all the frightening aspects of baking. And no danger of anything being burned. You will not have to work with complex temperature controls. These are desserts that are prepared with minimum mixing, chilling, and time.
Lots of novices do not want to make desserts as they are afraid to fail. No-bake recipes change that altogether. They are lenient, fast, and will come up with impressive outcomes each time. You will be a connoisseur of desserts the first time you make one.
This is the guide that takes you through all that you need to know. You will acquire basic skills, find recipes that no one can ever doubt, and become comfortable in the kitchen.
The Necessary Tools to Start With
But first of all, we should discuss the simple equipment before diving into recipes. No-bake desserts have an added advantage as you are likely to have most of these tools at your disposal.
Mixing and Prep Tools
You will have mixing bowls of various sizes. The three or four bowls allow preparation to be much easier. Take a good whisk to mix ingredients together. A rubber spatula is used to clean all the tasty stuff in your bowls.
Spoons and cups are absolutely necessitated. Even in the absence of an oven, baking needs to be precise. Electric mixers are optional and help in easing life. A hand mixer and a strong arm mixer is not bad.
Storage and Setting Equipment
Your new oven is refrigerator space. It is important to ensure that you have space before you begin any recipe. Other dishes and pans that will be needed include glass baking dishes, springform pans, muffin tins, and pie plates.
Parchment paper and plastic wrap become your most valuable friends. They do not allow sticking and ensure desserts have not gone stale. It is worth investing in some good quality storage containers as well.
Knowing the Pivotal Elements to Make Magic Work
No-bake desserts rely on specific components that solidify, harden, or bind together without cooking. The knowledge of these elements assists in achieving success on each occasion.
Binding Agents
Many desserts are made with cream cheese and mascarpone as they are rich and stable bases. When refrigerated, they naturally become thick. Condensed milk is used to give it a sweet taste and texture. Gelatin is used to solidify liquids into firm, sliceable desserts.
Such ingredients do not act like flour or eggs in conventional baking. They react to low temperatures rather than high temperatures.
Crust Components
The MVP of no-bake crusts is graham crackers. Melting butter into them makes it the ideal base. Oreos, digestive biscuits, and vanilla wafers are also very effective.
The ratio matters here. Normally, an average of 6 tablespoons of melted butter are used with 2 cups of crumbs. This mixture blends well and is pressed into a pan.
Flavor Boosters
Your desserts are improved with vanilla extract, cocoa powder, and instant coffee. Fresh fruit contributes to natural sweetness and beauty. Chocolate chips, caramel sauce, and nuts build mouth-watering textures and flavors.
Citrus zest should not be forgotten. Zest of lemon or lime does not add any liquid and brings flavor to foods.
Simple Tricks Every Novice Needs to Learn
With a couple of basic tricks in your hand, you will be successful with any no-bake recipe.
Creating the Perfect Crust
Begin with fully crushed cookies or crackers. No big chunks should remain. You desire fine crumbs that feel like wet sand when mixed with butter.
Put the mixture firmly in your pan. Pack it down using the bottom of a measuring cup. Be careful about corners and edges. Allow crust to chill a minimum of 30 minutes before adding filling.
Whipping Cream Properly
Cold cream whips best. First, put a bowl and beaters in the freezer and leave it for 10 minutes. Begin at low speed, and then slowly increase. Be careful, cream is easily turned into butter.
You desire soft peaks in the majority of recipes. This implies that the cream retains its shape but tips flop over gently. Stiff peaks are erect and are more useful in decoration.
Folding Ingredients Gently
Folding makes desserts light and airy. Take a rubber spatula and slice it in the center of the mixture. Scrape along the bottom and lift the spatula up and over. Keep on rotating the bowl and repeat.
Never stir vigorously. This is used to deflate whipped cream and produce dense desserts. Patience makes perfect here.
Recipe #1: Classic No-Bake Cheesecake
This recipe creates creamy, dreamy results without turning on the oven. It is the ideal introduction to no-bake desserts.
Ingredients You’ll Need
For the crust:
- 2 cups graham cracker crumbs
- 6 tablespoons melted butter
- 3 tablespoons sugar
For the filling:
- 16 ounces cream cheese (room temperature)
- 1 cup powdered sugar
- 1 teaspoon vanilla extract
- 1 cup heavy whipping cream
Step-by-Step Instructions
Combine graham cracker crumbs, melted butter, and sugar in a bowl. Press firmly into the bottom of a 9-inch springform pan. Refrigerate while making the filling.
Beat cream cheese until it is soft and fluffy. This takes about 2 minutes. Add vanilla and powdered sugar. Beat until thoroughly mixed.
Whip the heavy cream in another bowl to stiff peaks. Gently fold the whipped cream into the cream cheese mixture. Take your time with this step.
Pour the filling over the chilled crust. Smooth the top with a spatula. Cover with plastic wrap and refrigerate for 4 hours or overnight.
Pro Tips for Success
Room temperature cream cheese is crucial. Cold cream cheese forms lumps that are not going to be smooth. Allow it to rest for an hour on the counter before beginning.
Don’t skip the chilling time. Those hours are required by the cheesecake to set properly. Hurrying only results in a runny mess.
Serve with fresh berries, chocolate sauce, or caramel.
Recipe #2: Chocolate Peanut Butter Bars
These bars taste like your favorite candy bar but better. They are rich, satisfying, and are consumed quickly at any gathering.
What You’ll Need
Base layer:
- 2 cups crushed Oreos
- 4 tablespoons melted butter
Peanut butter layer:
- 1 cup creamy peanut butter
- 4 ounces cream cheese (softened)
- 1 cup powdered sugar
- 1 teaspoon vanilla extract
Chocolate topping:
- 2 cups chocolate chips
- 3 tablespoons coconut oil
How to Make These Irresistible Bars
Combine crushed Oreos and melted butter. Press into an 8×8 inch pan lined with parchment paper. Set aside.
Beat peanut butter and cream cheese together. Add powdered sugar and vanilla. Mix thoroughly. Spread this layer over the Oreo base evenly.
Combine chocolate chips and coconut oil and melt together. Microwave in 30-second intervals, stirring between each one. Pour over the peanut butter layer and spread to the edges.
Refrigerate for at least 3 hours. Cut into squares when firm.
Customization Ideas
Substitute peanut butter with almond or cashew butter. Use white chocolate instead of regular chocolate. Add chopped peanuts between layers for extra crunch.
These bars freeze beautifully for up to 3 months.
Recipe #3: Strawberry Icebox Cake
This is a fancy-looking dessert that virtually requires no skills. Layers of cookies and cream create magic while chilling.
Ingredient List
- 2 cups heavy whipping cream
- 3 tablespoons powdered sugar
- 1 teaspoon vanilla extract
- 1 pound fresh strawberries (sliced)
- 1 box graham crackers
Assembly Process
Whip cream with powdered sugar and vanilla until stiff peaks form. Reserve some strawberry slices for decoration.
Spread a thin layer of whipped cream in the bottom of a 9×13 inch dish. Place a layer of graham crackers on top. They should cover the bottom completely.
Spread about one-third of the remaining whipped cream over the crackers. Add a layer of sliced strawberries. Repeat these layers two more times, ending with whipped cream.
Decorate the top with reserved strawberry slices. Cover and refrigerate overnight.
Why This Works So Well
The graham crackers absorb moisture from the cream and soften into cake-like layers. The transformation happens during the overnight chill. You will swear you baked a real cake.
This technique works with chocolate wafers, vanilla wafers, or any flat cookie. Experiment with different fruits and flavors.
Recipe #4: Lemon Bars Without Baking
Bright, tangy lemon bars refresh your palate perfectly. These no-bake versions taste just as good as traditional ones.
Shopping List
Crust:
- 2 cups vanilla wafer crumbs
- 5 tablespoons melted butter
- 2 tablespoons sugar
Lemon filling:
- 14 ounces sweetened condensed milk
- 1/2 cup fresh lemon juice
- 1 tablespoon lemon zest
- 3 egg yolks
- Pinch of salt
Creating Sunshine in a Pan
Combine vanilla wafer crumbs, melted butter, and sugar. Press into an 8×8 inch pan. Chill for 30 minutes.
Whisk together condensed milk, lemon juice, lemon zest, egg yolks, and salt. With each whisk, the mixture will thicken slightly. This is due to the fact that the acid contained in lemon juice reacts with the milk.
Pour the lemon mixture over the chilled crust. Smooth the top. Refrigerate for at least 4 hours until set firm.
Dust with powdered sugar before serving.
Safety Note About Raw Eggs
This recipe uses raw egg yolks. The acid in lemon juice “cooks” them slightly, however, they remain raw. Use pasteurized eggs if you’re concerned. They’re available at most grocery stores.
Alternatively, look for recipes using gelatin instead of eggs.
Common Mistakes Beginners Make and How to Avoid Them
Learning from others’ mistakes saves you time and ingredients. The following are the most common issues and their resolutions.
Not Chilling Long Enough
Impatience ruins no-bake desserts. When recipes say “refrigerate overnight,” they mean it. Setting takes time. Cutting into desserts too early creates messy, runny disasters.
Set a timer on your phone. Plan desserts the day before you need them. Your patience pays off with perfect slices.
Using Cold Cream Cheese
Cold cream cheese doesn’t mix smoothly. You will end up with lumps that never disappear, no matter how long you beat the mixture. These lumps ruin the texture of your dessert.
Always allow cream cheese to sit at room temperature for 45-60 minutes. It should feel soft when you press it.
Overmixing Whipped Cream
Overbeaten cream turns into butter. You will notice the texture suddenly changes from fluffy to grainy. Once this happens, you can’t fix it.
Watch your cream carefully. Stop as soon as peaks form. The window between perfect and overbeaten is small.
Skipping Pan Preparation
Not lining your pan makes removal difficult or impossible. Desserts stick and tear when you try serving them.
Always line pans with parchment paper. Leave overhang on the sides so you can lift desserts out easily.
Comparison Table: Types of No-Bake Desserts
| Dessert Type | Difficulty Level | Chill Time Required | Best For | Key Ingredient |
|---|---|---|---|---|
| Cheesecakes | Easy | 4-6 hours | Special occasions | Cream cheese |
| Bars/Squares | Very Easy | 2-3 hours | Quick treats | Chocolate/peanut butter |
| Icebox Cakes | Very Easy | Overnight | Large gatherings | Cookies/crackers |
| Mousse | Medium | 2-4 hours | Elegant desserts | Whipped cream |
| Truffles | Easy | 1-2 hours | Gift giving | Chocolate |
| Pudding Cups | Very Easy | 1-2 hours | Kids’ parties | Instant pudding |
Time-Saving Tips for Busy Beginners
Making desserts shouldn’t consume your entire day. These strategies help you work smarter, not harder.
Prep Ingredients Ahead
Crush cookies and measure ingredients the night before. Store crumbs in airtight containers. Portion out butter and cream cheese to soften on the counter.
This advance work means actual assembly takes just minutes.
Use Kitchen Shortcuts
Store-bought whipped topping works when you’re short on time. Instant pudding mixes create quick fillings. Pre-made cookie crusts save several steps.
There’s no shame in shortcuts. They help you gain confidence before tackling everything from scratch. For more creative recipe ideas and cooking inspiration, visit TrendyBlitz.
Make Multiple Batches
Double or triple recipes and freeze extras. Most no-bake desserts freeze excellently. Wrap individual portions in plastic wrap, then aluminum foil.
Having desserts ready in your freezer means you’re always prepared for unexpected guests.
Storing and Serving Your No-Bake Creations
Proper storage keeps desserts fresh and delicious for days.
Refrigerator Storage Guidelines
Keep no-bake desserts covered in the refrigerator. Plastic wrap works well, but airtight containers work better. Most desserts stay fresh for 3-5 days.
Cheesecakes and cream-based desserts last about 4 days. Chocolate desserts hold up for 5-7 days typically.
Freezing for Later
Wrap desserts tightly in plastic wrap, then aluminum foil. This double layer prevents freezer burn. Label everything with the date and contents.
Frozen desserts stay good for 2-3 months. Thaw overnight in the refrigerator before serving.
Serving Temperature Matters
Let refrigerated desserts sit at room temperature for 10-15 minutes before serving. This slight warming enhances flavors and improves texture.
Frozen desserts often taste better slightly softened too.
Troubleshooting Guide: Fixing Common Problems
Even simple recipes sometimes go wrong. Here’s how to salvage your desserts.
Runny Filling
If your filling seems too liquid, add more cream cheese or whip additional cream to fold in. Sometimes adding a tablespoon of cornstarch helps thicken things up.
Make sure you used the correct measurements. Too much liquid ingredient creates runny disasters.
Crumbly Crust
Crusts that won’t stick together need more butter. Add melted butter one tablespoon at a time until the mixture feels like wet sand. It should hold together when squeezed.
Press the crust firmly and chill adequately. These steps help it set properly.
Grainy Texture
Grainy desserts usually mean you didn’t beat the cream cheese enough initially. Or you added powdered sugar too quickly. Beat cream cheese thoroughly until completely smooth before adding anything else.
Sift powdered sugar to remove lumps before mixing.
Expanding Your Skills: Next Steps After Mastering Basics
Once you’ve conquered basic recipes, try these challenges to level up your skills.
Layered Desserts
Create desserts with three or four distinct layers. Try combinations like chocolate, vanilla, and strawberry. The techniques stay the same, but presentation becomes more impressive.
Use clear glass dishes to show off your beautiful layers.
Individual Portions
Make desserts in small jars, cups, or muffin tins. Individual servings look professional and make portion control easy. They’re perfect for parties too.
Mason jars work wonderfully for layered desserts.
Experimenting With Flavors
Branch out from basic chocolate and vanilla. Try matcha, coffee, coconut, or chai spice. Add extracts like almond, peppermint, or coconut.
Seasonal fruits change your desserts throughout the year.
Budget-Friendly No-Bake Dessert Options
Creating delicious desserts doesn’t require expensive ingredients.
Using Affordable Ingredients
Store-brand cream cheese works just as well as name brands. Regular cocoa powder beats expensive Dutch-processed cocoa in most recipes. Frozen fruit costs less than fresh and works perfectly in many desserts.
Buy butter, cream cheese, and cream when they’re on sale. These items freeze well.
Making Smaller Batches
Cut recipes in half to reduce costs. An 8×8 inch pan feeds 6-8 people comfortably. You’ll waste less and spend less.
Smaller batches also let you try more recipes without major investment.
Substitution Strategies
Greek yogurt can partially replace cream cheese. Cool Whip substitutes for whipped cream. Vanilla wafers cost less than graham crackers in many stores.
Generic chocolate chips taste identical to name brands but cost significantly less. For additional tips on smart shopping and kitchen hacks, check out resources from Food Network’s kitchen tips.
Frequently Asked Questions
How long do no-bake desserts need to chill?
Most no-bake desserts require at least 2-4 hours in the refrigerator. Cheesecakes and layered desserts benefit from overnight chilling. This time allows ingredients to set properly and flavors to meld together.
Can I use low-fat ingredients in no-bake recipes?
Low-fat cream cheese and whipped topping change the texture and stability of desserts. They contain more water and less fat. This affects setting and creates softer, less stable results. Full-fat ingredients work best for success.
Do no-bake desserts freeze well?
Yes, most no-bake desserts freeze excellently. Wrap them tightly in plastic wrap and aluminum foil. They stay fresh for 2-3 months frozen. Thaw overnight in the refrigerator before serving.
Why did my whipped cream deflate?
Whipped cream deflates when overbeaten or not stabilized. It also deflates if folded too vigorously into other ingredients. Add powdered sugar when whipping to help stabilize it. Fold gently using proper technique.
Can I make no-bake desserts without cream cheese?
Absolutely. Many no-bake desserts use whipped cream, pudding, or condensed milk as bases instead. Mousse, icebox cakes, and chocolate truffles don’t require cream cheese at all.
What’s the best way to cut clean slices?
Use a sharp knife dipped in hot water, then wiped dry between each cut. This technique melts through the dessert cleanly. Alternatively, use unflavored dental floss for perfectly clean cuts through cheesecakes.
Conclusion: Your No-Bake Journey Starts Now
No-bake desserts open up a whole world of sweet possibilities. You don’t need fancy equipment, years of experience, or perfect technique. These recipes work with basic ingredients and simple steps.
Start with one easy recipe from this guide. Follow the instructions carefully and don’t rush the chilling time. Your first success will boost your confidence tremendously.
Remember that everyone makes mistakes while learning. Runny cheesecakes and crumbly crusts happen to experienced bakers too. Each attempt teaches you something valuable.
The beauty of no-bake desserts is their forgiving nature. Most problems can be fixed or hidden with creative toppings. Even “failed” desserts usually taste delicious.
Keep practicing and experimenting. Try new flavor combinations. Adjust recipes to match your preferences. Soon you’ll create stunning desserts without even thinking about the steps.
Your kitchen adventures begin with a single dessert. Choose your recipe, gather your ingredients, and start creating. The satisfying taste of homemade treats awaits you.